
The steps below are intended for users who currently use the Mail app on their Mac and are migrating from our on-premise exchange server (mail.vcs.net) to office 365.
Important Note: We are no longer supporting Mac Mail as an email client for @vcs.net. We are standardizing on Microsoft Outlook for Mac to ensure the best user experience and compatibility with the new Office 365 Exchange Server.
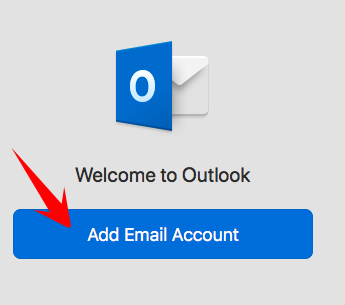
Launch Outlook to configure Office 365
1. Launch Outlook, go to Finder, Applications and open Microsoft Outlook.app
2. Next, click Add Email Account
NOTE: If you don't get the welcome to Outlook "add email account" and Outlook opens with an account already configured, skip the steps and follow the instructions on this article: https://valleychristian.zendesk.com/hc/en-us/articles/360014856451-Office-365-email-migration-using-Outlook-for-Mac otherwise continue below.
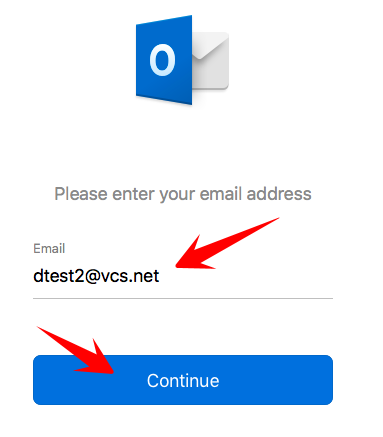
3. Enter your @vcs.net email address and click Continue
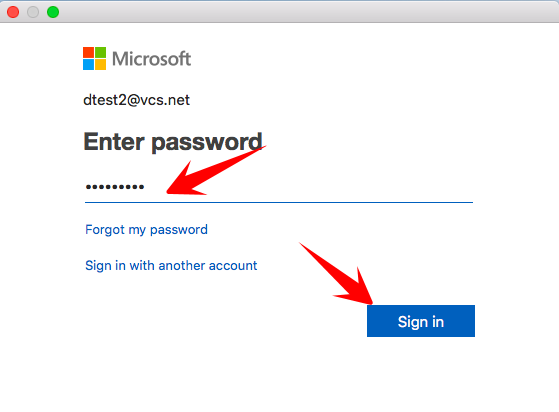
4. Next, enter your email password and click Sign in (note: your password is the same as your previous email password)
5. Finally click Done to add the account and close the Accounts dialog box
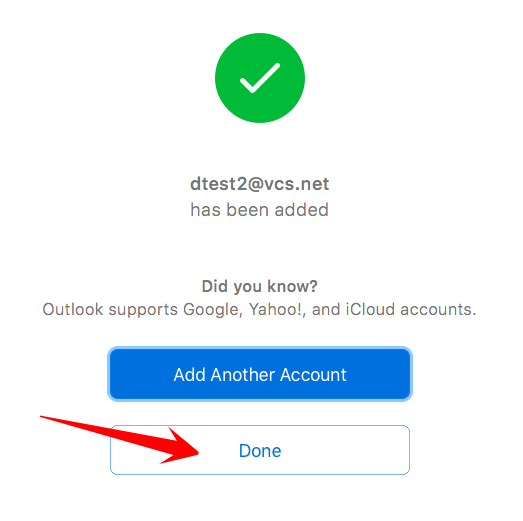
Note: Depending on the size of your mailbox it may take some time before all your emails and folders are downloaded
6. Remove the old Mail app account and set Outlook to be your default email reader
- Open the old Mail app and click Mail then Preferences
- Under General, change Default email reader: Microsoft Outlook.app
- Close and Quit Mail
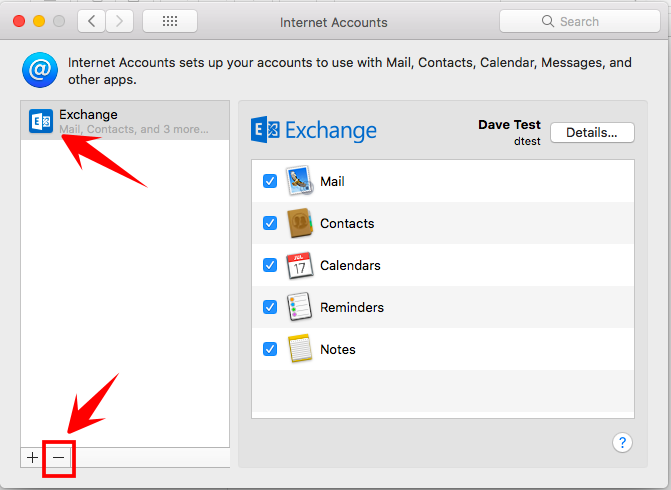
7. Remove the old Exchange Account from Mail
- Go to System Preferences and select Internet Accounts, select the Exchange (@vcs.net) account and click the – minus button to remove
If you would like to add your @warriorlife.net email to outlook, see this knowledge base article for instructions: https://valleychristian.zendesk.com/hc/en-us/articles/360014420272-How-to-Add-Warriorlife-mailbox-to-Outlook-for-Mac
Comments
0 comments
Please sign in to leave a comment.