
To project your PC laptop in a classroom or office:
1. Identify the type of display cable(s) in your classroom or office
- It may have a VGA and/or an HDMI cable
| HDMI | USB-C |
2. Identify the type of display port(s) on on your laptop
- It may have an HDMI and/or a USB-C port
3. Connect the display cable to your laptop display port directly, if possible
-
You may need a display adapter (aka "dongle") to connect the cable to the laptop if your laptop does not have a port that is compatible with the cable.
HDMI to USB-C
4. Turn on the projector
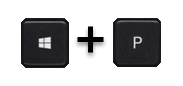
5. Press the Windows + P keys and your laptop display settings will appear on the right side of your screen, then click Duplicate to display your laptop
- Or click Extend and use the projector as a second screen
 |
6. You may also need to select the display source on the projector remote
- Some remotes may have buttons for each type of display input, including VGA and HDMI
- Some remotes may have a Computer button that will identify your laptop display
- Some remotes may have a Source Search button that can be pressed repeatedly until the projector finds your laptop display
7. Take a look at these articles for additional projector options
Comments
0 comments
Please sign in to leave a comment.